-
Notifications
You must be signed in to change notification settings - Fork 1
Play Console Setup
- Google Play Console admin access
- Google Cloud Console access
- An existing app in the Google Play Console
- Owner or administrator role in Play Console
Tip
If you see Google Play Console or Google Developer Console in your local language, add &hl=en at the end of the URL (before any #...) to switch to English. All the links below already have this to make it easier to find the correct buttons.
Note
if you face issues when following these instructions, you might want to refer to the official documentation by Google.
-
Open the Google Play Console
- Click Account Details, and note the Google Cloud Project ID listed there
-
Enable the Enable the Google Play Developer API by selecting an existing Google Cloud Project that fits your needs and pushing ENABLE
- If you don't have an existing project or prefer to have a dedicated one for fastlane, create a new one here and follow the instructions
-
Open Service Accounts on Google Cloud and select the project you'd like to use
-
Click the CREATE SERVICE ACCOUNT button at the top of the Google Cloud Platform Console page
-
Verify that you are on the correct Google Cloud Platform Project by looking for the Google Cloud Project ID from earlier within the light gray text in the second input, preceding .iam.gserviceaccount.com, or by checking the project name in the navigation bar. If not, open the picker in the top navigation bar, and find the right one.
-
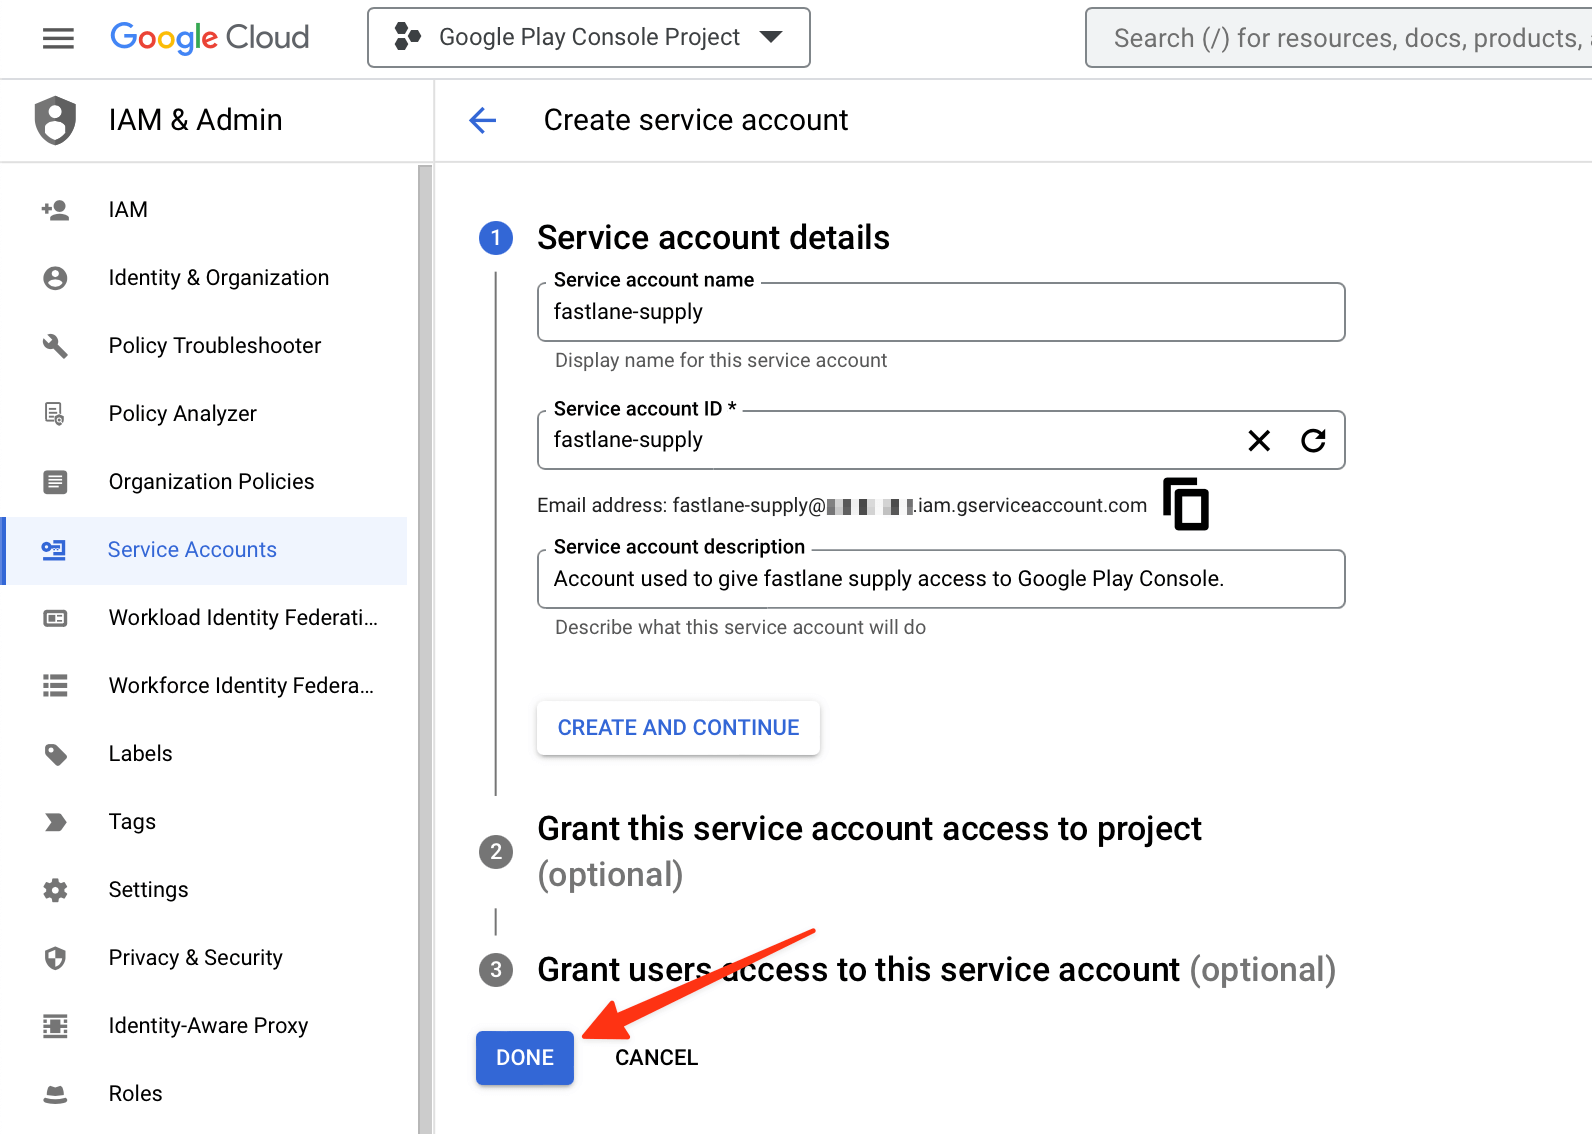
Provide a Service account name (e.g.
fastlane-supply) -
Copy the generated email address that is noted below the Service account-ID field for later use
-
Click DONE (don't click CREATE AND CONTINUE as the optional steps such as granting access are not needed):
-
Click on the Actions vertical three-dot icon of the service account you just created
-
Select Manage keys on the menu
-
Click ADD KEY → Create New Key
-
Make sure JSON is selected as the Key type, and click CREATE
-
Save the file on your computer when prompted and remember where it was saved at
-
-
Open the Google Play Console and select Users and Permissions
-
Click Invite new users
-
Paste the email address you saved for later use into the email address field
-
Click on Account Permissions
-
Choose the permissions you'd like this account to have. We recommend Admin (all permissions), but you may want to manually select all checkboxes and leave out some of the Releases permissions such as Release to production, exclude devices, and use Play App Signing
-
Click on Invite User
-
You can use fastlane run validate_play_store_json_key json_key:/path/to/your/downloaded/file.json to test the connection to Google Play Store with the downloaded private key. Once that works, add the path to the JSON file to your Appfile:
json_key_file("path/to/your/play-store-credentials.json")
package_name("my.package.name")
The path is relative to where you normally run fastlane.
-
Encode Service Account Key
On macOS/Linux:
base64 -i path/to/play-console-service-account.json
On Windows (PowerShell):
[Convert]::ToBase64String([System.IO.File]::ReadAllBytes("path/to/play-console-service-account.json"))
Or navigate to the website to encode or decode file here
-
Store in GitHub Secrets
- Go to repository Settings > Secrets and variables > Actions
- Add new repository secret:
- Name:
PLAY_STORE_CREDENTIALS - Value: Base64 encoded service account JSON
- Name:
