最近想为自己的博客增加一个评论功能。多说已经倒下了,畅言需要网站备案,isso 看起来也不是很好用,算了,自己折腾一个吧。
评论系统其实还是又很多复杂的地方的,不能简单的画一个表单完事,会有很多垃圾评论的 →_→。我的博客系统暂时没有用户系统,一次需要一个第三方登录。
第三方登录有 OAuth 2.0 标准,什么是 OAuth 2.0 请参考阮一峰老师的文章 http://www.ruanyifeng.com/blog/2014/05/oauth_2_0.html。
为什么使用 Github ? 因为 QQ、微信的第三方登录都需要你的域名有备案,而且需要企业用户才能接入,也就是说你的现有个公司 →→。考虑到技术博客会看的都是码农们,还是用 Github 吧,毕竟。。。也是全球最大的搞基网站了 →→。
为了方便描述,我们这边画一个大致的 OAuth2.0 的流程图。
 前端                 后端                      后端             后端
 -—---------      ----------------------     -------------     ----------
| Client ID | -->| code + Client Secret |-->|access_token |-->| user info |
 -----------      ----------------------     ------------      ----------
具体也可以查阅 Github 官方文档 https://developer.github.com/apps/building-oauth-apps/authorizing-oauth-apps/
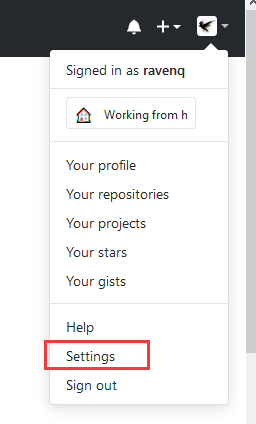
使用 Github 第三方登录,首先需要注册一个 Github Application.
按照步骤注册后可以得到 ClientId 和 Client Secret。
最后需要设置一下回调地址。
根据 OAuth2.0 规范,第一步是根据 ClientId 获取到 code(后面需要这个 code + SecretID 换取access_token)。
获取 code 的步骤很简单,只要拼接好一个 URL 访问,带用户操作完成后,Github 会重定向会第一步中设置的回调地址。
https://github.com/login/oauth/authorize?client_id=your_client_id&redirect_uri=your_callback_url&scope=user&state=random_string具体 URL 参数如下:
| name | type | description |
|---|---|---|
| client_id | string | 第一步中注册得到的ClientID |
| redirect_uri | string | 第一步中设置的回调地址 |
| loin | string | 推荐登录的 Github 账户,一般不填 |
| scope | string | 这个参数指定了最后能获取到的信息,取值范围有 user 和 repo 等等,默认同时取 user 和 repo 的信息,详细取值范围见Github 文档 |
| state | string | 你设定的一个随机值,用来防止 cross-sit 攻击 |
| allow_signup | string | 这个参数指定是否允许用户在认证的时候注册 Github 账号,默认是 true |
如下是我的博客的前端代码示例:
methods: {
  ...mapMutations(['setUser']),
  loginWithGithub() {
    this.spinning = true
    const oauthUri = GITHUB.OAUTH_URI
    const redirectUri = GITHUB.REDIRECT_URI
    const clientId = GITHUB.CLIENT_ID
    const state = new Date().getTime()
    const url = `${oauthUri}?client_id=${clientId}&redirect_uri=${redirectUri}&scope=user&state=${state}`
    window.loginWithGithub = (code, vertifyState) => {
      this.$api.LoginWithGithub(code, vertifyState).then(res => {
        const user = res.data
        this.setUser(user)
        this.spinning = false
      })
    }
    const myWindow = window.open(
      url,
      'aqcoder.com-login-github',
      'modal=yes,toolbar=no,titlebar=no,menuba=no,location=no,top=200,left=500,width=600,height=400'
    )
    myWindow.focus()

    setTimeout(() => {
      if (!this.isAuthenticated) {
        this.$message.error('登录超时')
        this.spinning = false
      }
    }, 60000)
  },
}
这里我们没有使用 <a>标签,因为我的博客前端是用 Vue 构建的单页应用,如果使用<a>标签会存在跳转问题,所以我这里使用了window.open 弹出一个网页,待 Github 回调后,在会用window.opener.loginGithub调用回来。这样不会跳转网页,会比较平滑。
回调地址也的代码如下:
login-github.vue
<template>
  <div />
</template>
<script>
import isNil from 'lodash.isnil'
export default {
  layout: 'empty',
  beforeRouteEnter(to, from, next) {
    next(vm => {
      const code = to.query.code
      const state = to.query.state
      if (!isNil(code)) {
        window.opener.loginWithGithub(code, state)
        window.close()
      }
    })
  },
  mounted() {
    window.onblur = () => {
      window.focus()
    }
  }
}
</script>
详细代码可以见我的博客前端代码: http://www.github.com/ravenq/gvf-client
第二步就是用 code + Client Secret 获取 access_token 了。那这一步为什么要在后端做呢,可能有的同学是存 Vue 应用,没有后端会有这个疑问。其实这一不要挪到后端做的理由很简单。
Client Secret 不能暴露给在前端网页,否则会有人拿着你的 Client Secret 干一些非法勾当,所以这一步只能放到后端。放在前端人家一个 F12 啥都看到了。
获取access_token 的接口同样是 http 协议, 这样各个语言不需要 SDK 都可以直接使用。
POST https://github.com/login/oauth/access_token具体参数如下:
| Name | Type | Description |
|---|---|---|
| client_id | string | 第一步中获取到的 ClientID |
| cleint_secret | string | 第一步中获取到的 ClientSecret |
| code | string | 第二步中前端获取到的 code |
| redirect_uri | string | 第一步中设置的回调地址 |
| state | string | 第一步中设置的随机值 |
接口的返回值会根据你的 http 头部的 Accept 的值返回不同的格式
application/x-www-form-urlencoded
access_token=e72e16c7e42f292c6912e7710c838347ae178b4a&token_type=bearerapplication/json
{
  "access_token": "e72e16c7e42f292c6912e7710c838347ae178b4a",
  "scope": "repo,gist",
  "token_type": "bearer"
}
application/xml
<OAuth>
  <token_type>bearer</token_type>
  <scope>repo,gist</scope>
  <access_token>e72e16c7e42f292c6912e7710c838347ae178b4a</access_token>
</OAuth>
下面是我的博客祸端代码,使用 Golang 编写,详细见我的博客后端项目 http://www.github.com/ravenq/gvf-server
  var v map[string]string
  json.Unmarshal(c.Ctx.Input.RequestBody, &v)
  code := v["code"]
  state := v["state"]
  clientID := beego.AppConfig.String("GITHUB_CLIENT_ID")
  clientSecret := beego.AppConfig.String("GITHUB_CLIENT_SECRET")

  req := httplib.Post("https://github.com/login/oauth/access_token")
  req.Param("client_id", clientID)
  req.Param("client_secret", clientSecret)
  req.Param("code", code)
  req.Param("state", state)
  req.Header("Content-Type", "application/json")
  req.Header("Accept", "application/json")

  var accRet GithubAccessResult
  err := req.ToJSON(&accRet)
  if err != nil {
    c.Data["json"] = errors.New(fmt.Sprintf("Error: %v", err))
    c.ServeJSON()
    return
}这一步也是在后端做的,API 如下:
GET https://api.github.com/user我的博客后端代码片段如下:
 // 获取 user info
  reqUser := httplib.Get(fmt.Sprintf("https://api.github.com/user?access_token=%s", accRet.AccessToken))

  var githubUser GithubUser
  errGetUser := reqUser.ToJSON(&githubUser)
  if err != nil {
    c.Data["json"] = errors.New(fmt.Sprintf("Error: %v", errGetUser))
    c.ServeJSON()
    return
  }
因为我的博客没有做完整的用户系统,只是在评论模块想加入一个用户认证过程,防止垃圾评论。所以后面两步就直接在后端做了,直接使用从Github获取的信息注册了用户。
完整的后端代码如下:
func (c *UserController) LoginWithGithub() {
  // 获取access_token
  var v map[string]string
  json.Unmarshal(c.Ctx.Input.RequestBody, &v)
  code := v["code"]
  state := v["state"]
  clientID := beego.AppConfig.String("GITHUB_CLIENT_ID")
  clientSecret := beego.AppConfig.String("GITHUB_CLIENT_SECRET")

  req := httplib.Post("https://github.com/login/oauth/access_token")
  req.Param("client_id", clientID)
  req.Param("client_secret", clientSecret)
  req.Param("code", code)
  req.Param("state", state)
  req.Header("Content-Type", "application/json")
  req.Header("Accept", "application/json")

  var accRet GithubAccessResult
  err := req.ToJSON(&accRet)
  if err != nil {
    c.Data["json"] = errors.New(fmt.Sprintf("Error: %v", err))
    c.ServeJSON()
    return
  }

  // 获取 user info
  reqUser := httplib.Get(fmt.Sprintf("https://api.github.com/user?access_token=%s", accRet.AccessToken))

  var githubUser GithubUser
  errGetUser := reqUser.ToJSON(&githubUser)
  if err != nil {
    c.Data["json"] = errors.New(fmt.Sprintf("Error: %v", errGetUser))
    c.ServeJSON()
    return
  }

  // 注册用户
  foreignId := fmt.Sprintf("github-%d", githubUser.ID)
  user, errGetUser := models.GetUserByForeignId(foreignId)
  if errGetUser != nil || user == nil {
    user = &models.User{}
    user.Name = githubUser.Name
    user.Nick = githubUser.Name
    user.AvatarUrl = githubUser.AvatarURL
    user.Email = githubUser.Email
    user.UserType = models.UserType_GITHUB
    user.ForeignId = foreignId
    user.IsAdmin = false
    models.AddUser(user)
  }

  // 设置登录 session
  c.SetSession(utils.TOKEN, user)
  user.Token = c.CruSession.SessionID()
  c.Data["json"] = utils.NewResult(user, nil)

  c.ServeJSON()
}这样整个使用 Github OAuth 登录就这样完成了,欢迎到我的博客体验: http://www.aqcoder.com


