Use of this sample app is subject to our Terms of Use.
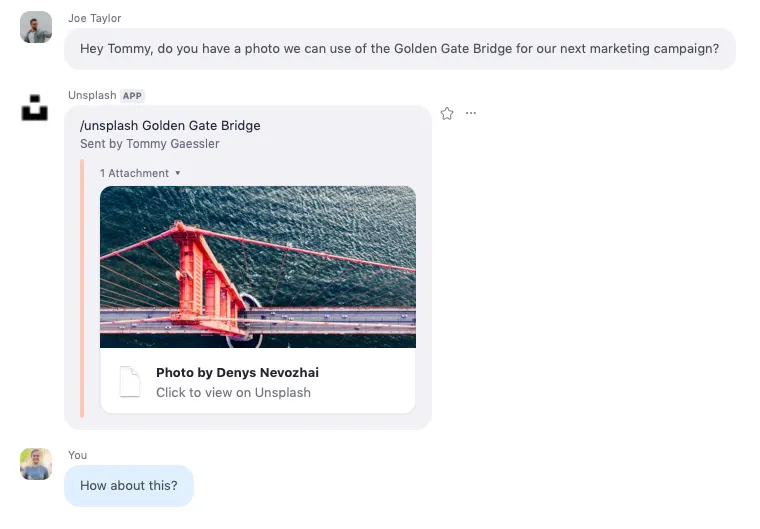
This is a sample app that sends Unsplash photos to Zoom Team Chat.
If you would like to skip these steps and just deploy the finished code to Heroku, click the Deploy to Heroku button. (You will still need to configure a few simple things, so skip to Deployment.)
In terminal, run the following command to clone the repo:
$ git clone https://github.com/zoom/unsplash-chatbot.git
-
In terminal, cd into the cloned repo:
$ cd unsplash-chatbot -
Then install the dependencies:
$ npm install -
Create an environment file to store your credentials:
$ touch .env -
Download PostgreSQL here or if on a Mac install using Homebrew,
$ brew install postgresql -
Once PostgreSQL is installed, follow these commands if you haven’t set it up before,
$ brew services start postgresql$ psql postgres -
You should be inside the PostgreSQL terminal now and see a postgres=# preifx. Now let’s create a database user called "me" with a password of "password"
postgres=# CREATE ROLE me WITH LOGIN PASSWORD 'password';postgres=# ALTER ROLE me CREATEDB;postgres=# \q -
You have just added yourself as a user who has the create database permission. Now type this to connect to postgres as your user,
$ psql -d postgres -U me -
Now that PostgreSQL is configured, let’s create a database,
postgres=> CREATE DATABASE unsplash_for_zoom_team_chat; -
Back in the
.envfile, add the following code and insert your Zoom Team Chat App credentials, your Unsplash Access Key, and a database encryption key:UNSPLASH_ACCESS_KEY=Required ZOOM_CLIENT_ID=Required ZOOM_CLIENT_SECRET=Required ZOOM_BOT_JID=Required ZOOM_WEBHOOK_SECRET_TOKEN=Required DATABASE_ENCRYPTION_KEY=Required DATABASE_ENCRYPTION_ALGO=aes256 DATABASE_URL=postgres://me:password@localhost:5432/unsplash_for_zoom_team_chatIf you followed my instructions on setting up PostgreSQL, don't change the DATABASE_URL. If you have setup PostgreSQL before or set it up differently than me, use this convention for the DATABASE_URL postgres://DBUSERNAME:PASSWORD@SERVER:PORT/DATABASE.
-
Save and close
.env. -
Create the users table in your database and add the pgcrypto encryption extension by running the seed file:
$ node seed.js -
Then start the server:
$ npm run start -
We need to expose the local server to the internet to accept post requests, we will use Ngrok (free) for this.
Once installed, open a new terminal tab and run:
$ ngrok http 4000 -
Copy the ngrok https url and paste it in the Bot endpoint URL input on your Zoom App's Features section. Remember to include
/unsplashpath.Example:
https://abc123.ngrok.io/unsplash -
Click "Save".
-
On your Zoom Team Chat App's Credentials section, go to the Local Test or Submit page depending on which envoirnment you are using (Development or Production), and click "Add". After authorizing, you should be taken to Zoom Team Chat and see a message from the Unsplash Team Chat App
Thanks for installing Unsplash for Zoom Team Chat!
-
Now that your Team Chat App is installed on your Zoom account, send a message using your slash command:
/unsplash mountains
-
After clicking the "Deploy to Heroku" button, enter a name for your app (or leave it blank to have a name generated for you), and insert your Zoom Team Chat App credentials, your Unsplash Access Key, and a database encryption key:
UNSPLASH_ACCESS_KEY(Your Unsplash Access Key, it's the same for production and development, found on your Unsplash App Page)ZOOM_CLIENT_ID(Your Zoom Production Client ID, found on your App's Credentials page)ZOOM_CLIENT_SECRET(Your Zoom Production Client Secret, found on your App's Credentials page)ZOOM_BOT_JID(Your Zoom Production Bot JID, found on your App's Features page)ZOOM_WEBHOOK_SECRET_TOKEN(Your Zoom Webhook Secret Token, found on your App's Features page)DATABASE_ENCRYPTION_KEY(An encryption key used to encrypt the data in your database. Treat this key secret, like a password)DATABASE_ENCRYPTION_ALGO(An encryption algorithm used to encrypt your the data in your database)
The database will automatically be created, and the DATABASE_URL environment variable will automatically be set in Heroku.
-
Then click "Deploy App".
-
Copy the Heroku url and paste it in the Bot endpoint URL input on your Zoom App's Features section. Remember to include
/unsplashpath.Example:
https://abc123.herokuapp.com/unsplash
-
If you cloned this repo, you may use the Heroku CLI to deploy your server. Remember to provision Postgres and set your config vars (envoirnment variables).
-
Create the users table in your database and add the pgcrypto encryption extension by running the seed file:
$ heroku run node seed.js -
Copy the Heroku url and paste it in the Bot endpoint URL input on your Zoom App's Features section. Remember to include
/unsplashpath.Example:
https://abc123.herokuapp.com/unsplash
-
For Other Server Hosting information, see this tutorial.
-
Copy the deployed url and paste it in the Bot endpoint URL input on your Zoom App's Features section. Remember to include
/unsplashpath.Example:
https://abc123.compute-1.amazonaws.com/unsplash
Now you are ready to use the Unsplash Team Chat App for Zoom.
If you're looking for help, try Developer Support or our Developer Forum. Priority support is also available with Premier Developer Support plans.
