-
Notifications
You must be signed in to change notification settings - Fork 455
The CI environment Pipeline usage
This section provides a guideline on how to use the CARML CI environment pipelines.
To validate updates to a module template, you can perform the following steps:
- (Optionally) Update the module's test files to reflect your changes.
- Push the local changes to the repository (using a branch that is not
main|master). - On the DevOps platform, navigate to your pipelines and select the pipeline that was registered for the module you updated.
- Select the branch with your updated template.
- (Optionally) disable the
Remove deployed moduleinput parameter in case you don't want to apply the default behavior and want to skip the deletion of the test-deployed resources to check them post-deployment. - (Optionally) adjust the
Publish prerelease moduleflag in case you want to publish a prerelease version of your updated module from your development branch.Note: The module version is assigned a prerelease suffix.
- Trigger the pipeline.
Once the pipeline concludes, it will either be in a green (success) or red (failed) state, depending on how the module performed.
Pipeline logs are available for troubleshooting and provide detailed information in case of failures. If errors occur in the Static validation phase, you may only see the failed test and need to expand the error message. How this looks like depends on the DevOps platform you use.
To add a new module pipeline, we recommend to create a copy of a currently existing module pipeline and adjust all module-specific properties, e.g., triggers and module paths. The registration of the pipeline depends on the DevOps platform you're using.
This section provides a step-by-step guideline on how to operate the pipelines based on the chosen DevOps platform, GitHub or Azure DevOps.
This section focuses on GitHub Actions & Workflows.
GitHub workflows
To trigger a workflow in GitHub:
-
Navigate to the 'Actions' tab in your repository.

-
Select the pipeline of your choice from the list on the left, followed by 'Run workflow' to the right. You can then select the branch of your choice and trigger the pipeline by clicking on the green 'Run workflow' button.
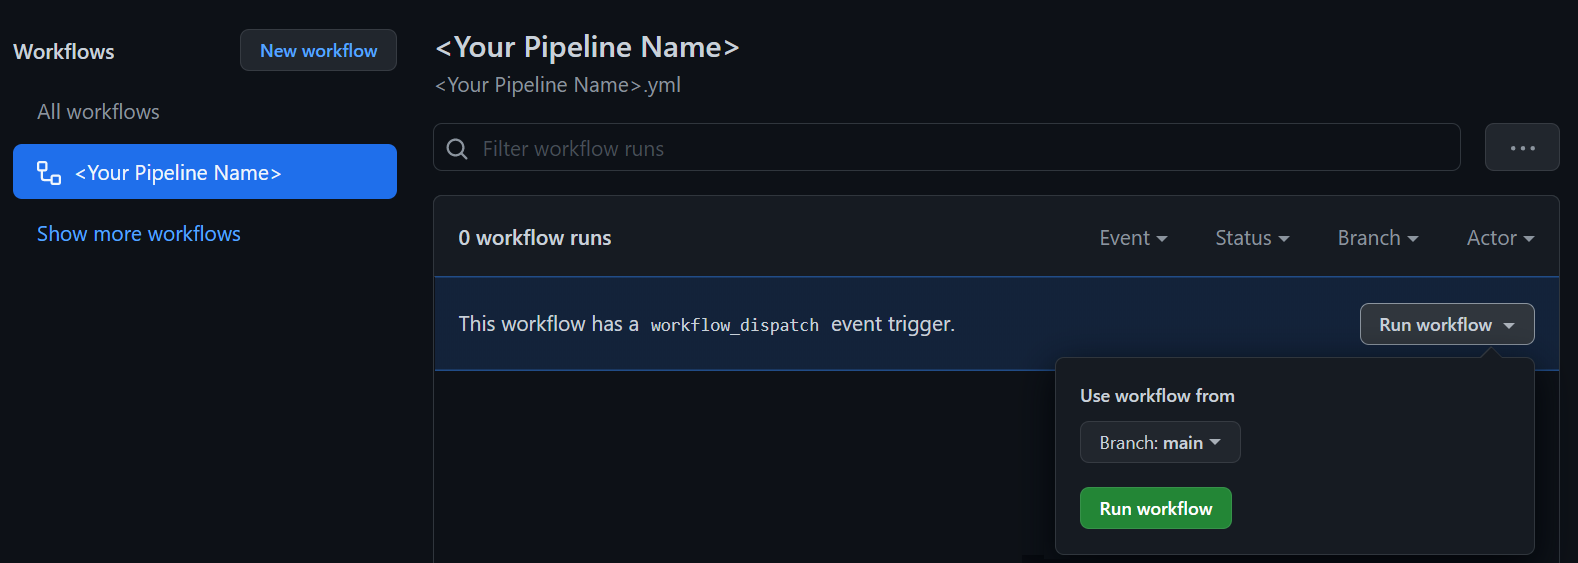
Note: Depending on the pipeline you selected you may have additional input parameters you can provide aside from the branch. An outline can be found in the Module pipeline inputs section.
To register a workflow in GitHub you have to create the workflow file (.yml) and store it inside the .github/workflows folder.
Note: Once merged to
main|master, GitHub will automatically list the new workflow in the 'Actions' tab. Workflows are not registered from a branch unless you specify a temporal push trigger targeting your branch.
This section focuses on Azure DevOps pipelines.
Azure DevOps pipelines
To trigger a pipeline in Azure DevOps:
-
Navigate to the 'Pipelines' section (blue rocket) and select the pipeline you want to trigger.

-
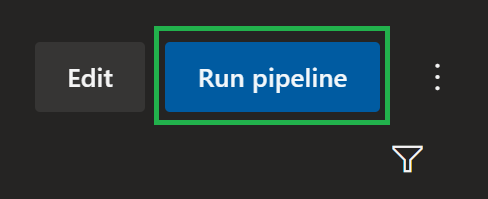
Once selected, click on the 'Run pipeline' button on the top right.
-
Now you can trigger the pipeline by selecting the 'Run' button on the bottom right.
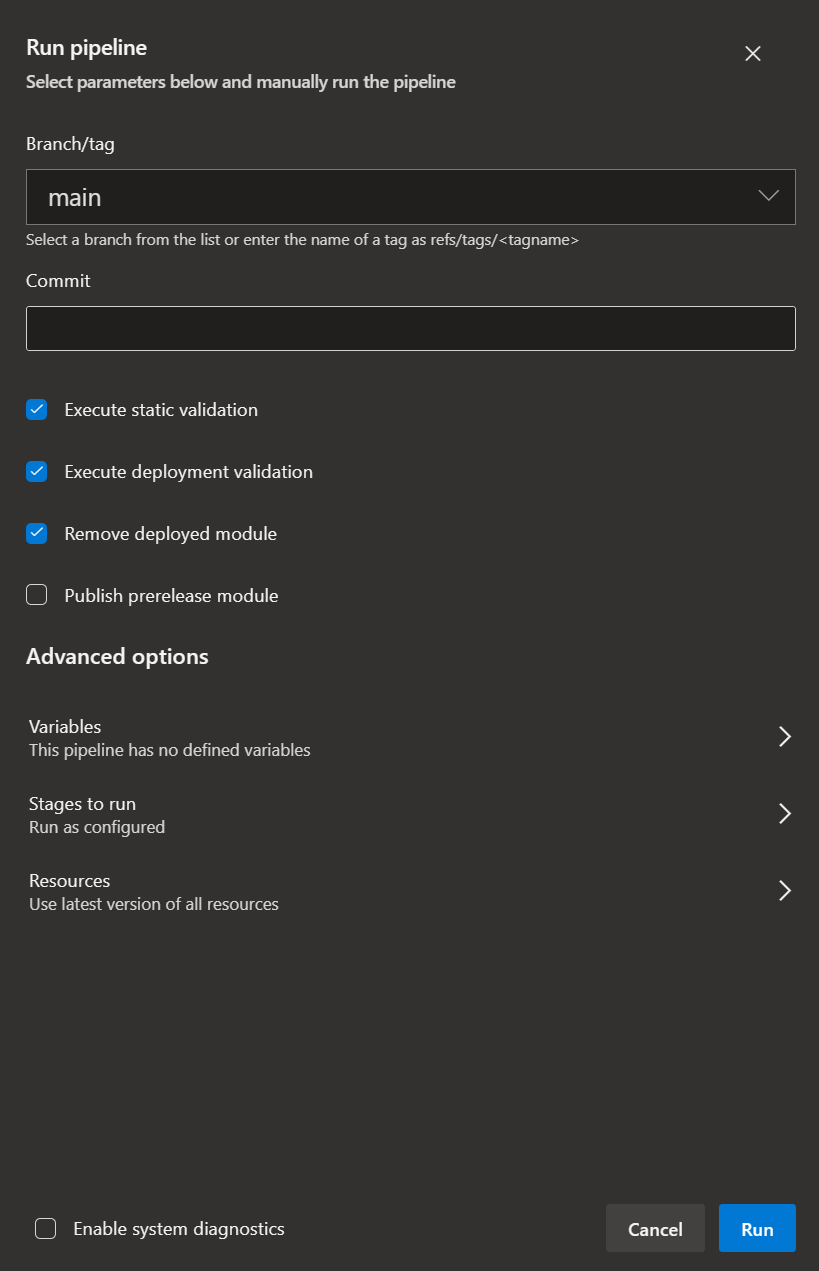
Note: Depending on the pipeline you selected you may have additional input parameters you can provide aside from the branch. An outline can be found in the Module pipeline inputs section.
To register a pipeline in Azure DevOps:
-
Create a workflow file (.yml) and upload it to a repository of your choice (e.g., in Azure DevOps or GitHub).
-
Navigate to the 'Pipelines' section (blue rocket) and select the 'New pipeline' button on the top right.

-
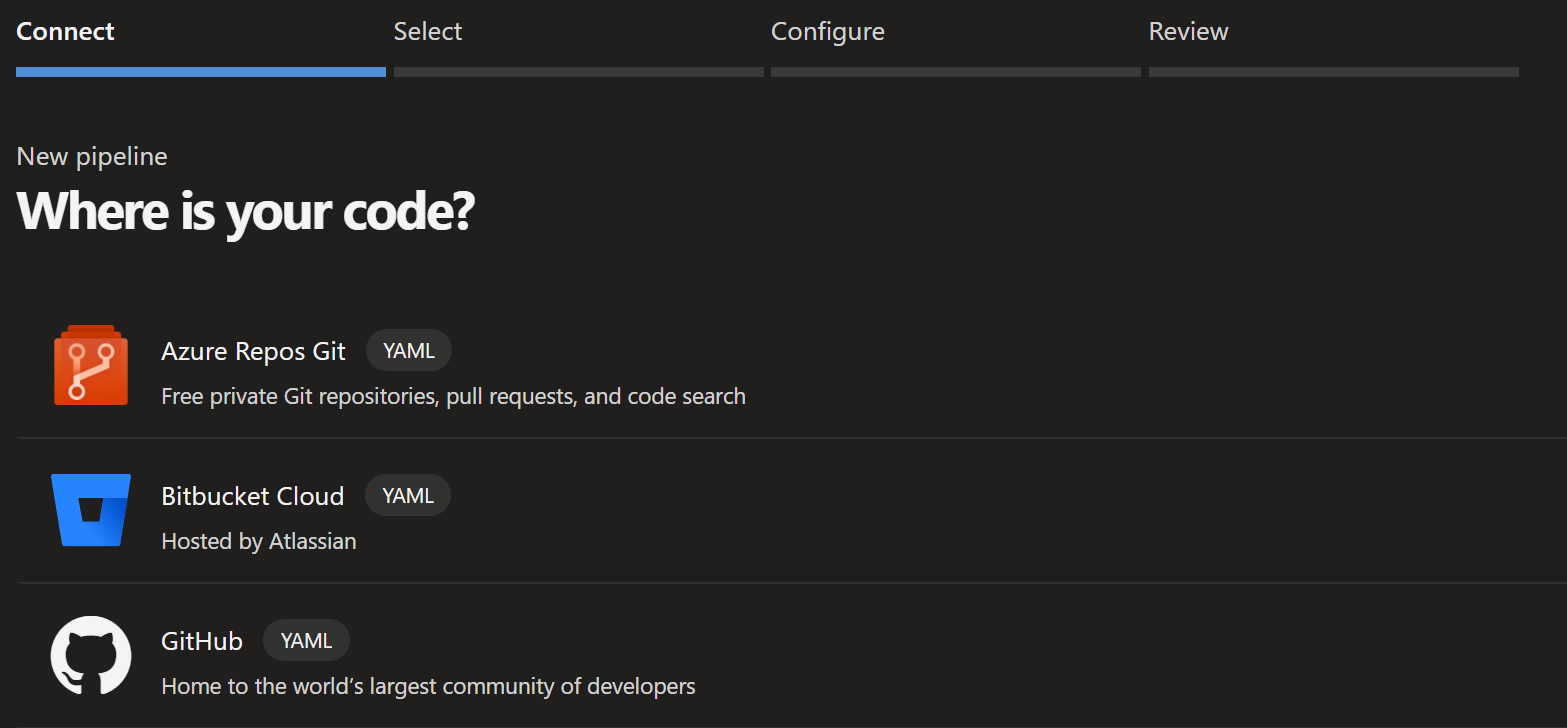
Next, select the repository-type you stored your template in. Azure DevOps will then try to fetch all repositories you have access to.
-
Now, we have to select the particular repository to get the pipeline file from.
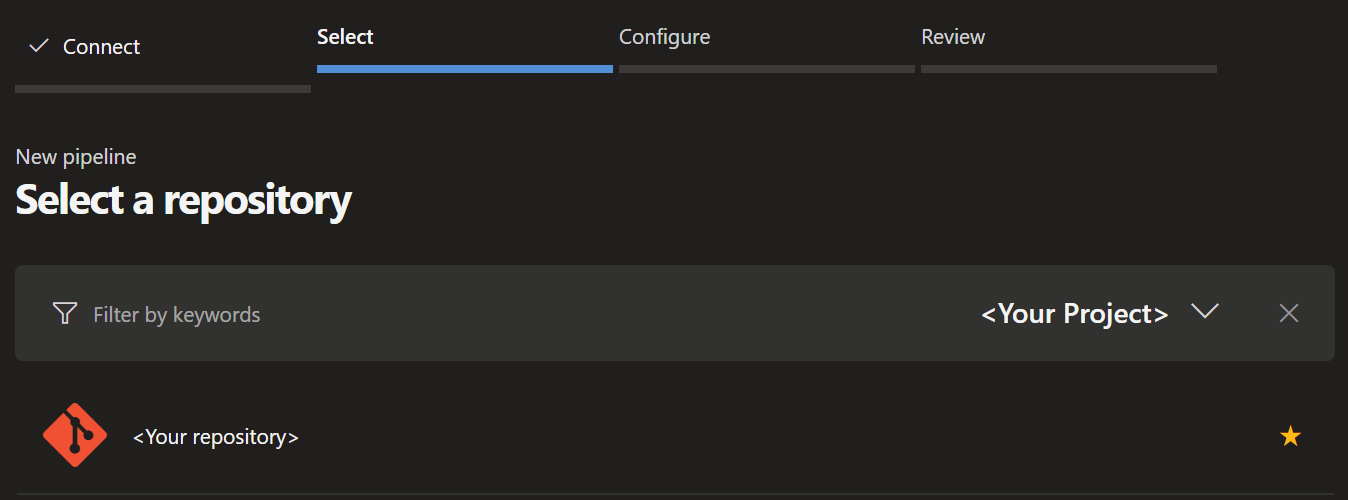
-
Following, choose 'Existing Azure Pipelines YAML file' on the bottom of the list.
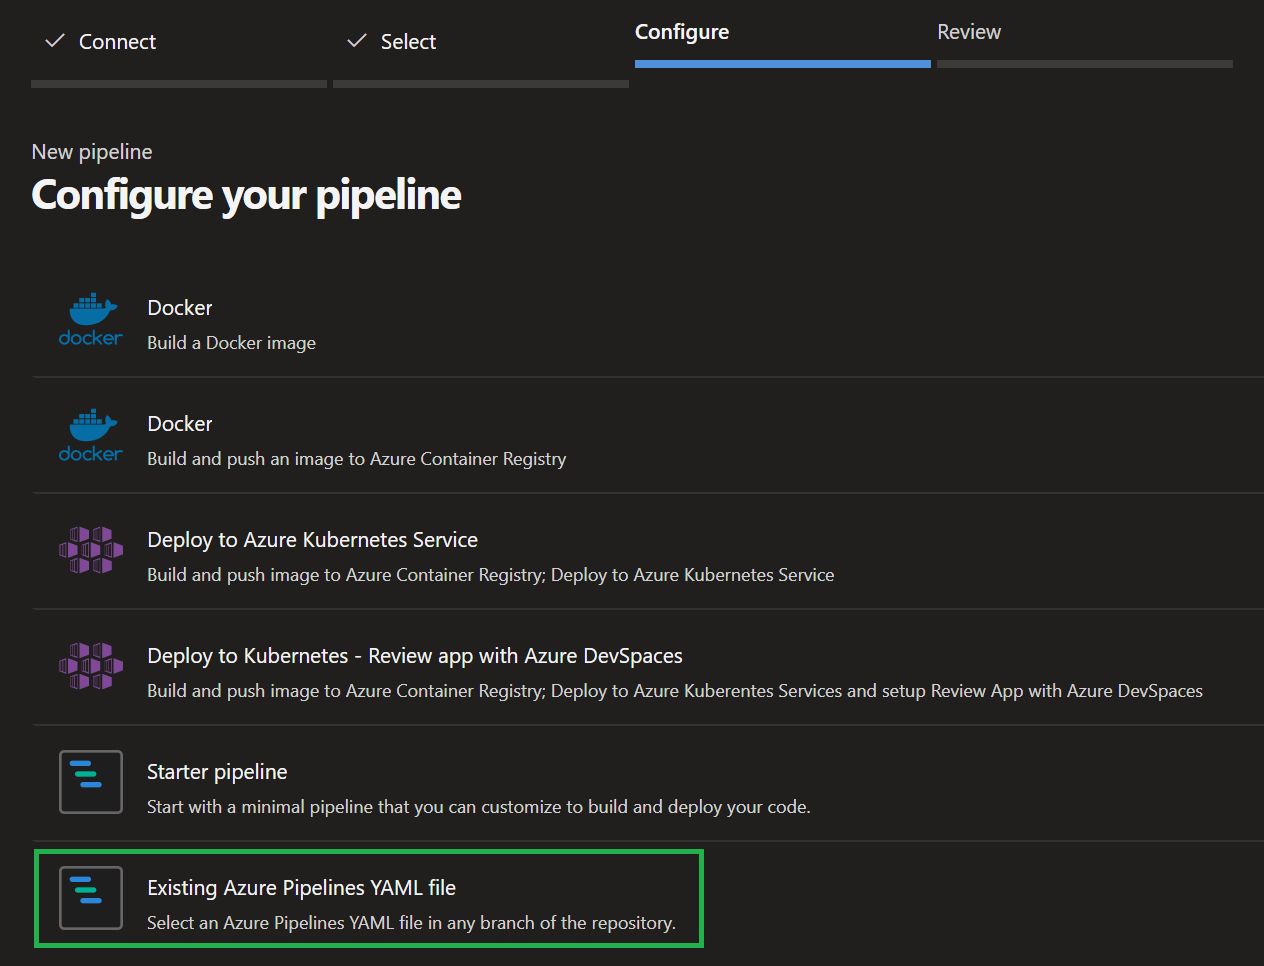
-
The previous action will open a new blade that asks you for the branch you stored the pipeline file in (e.g.,
master) and then asks for the relative path (from root of the repository) of the pipeline file.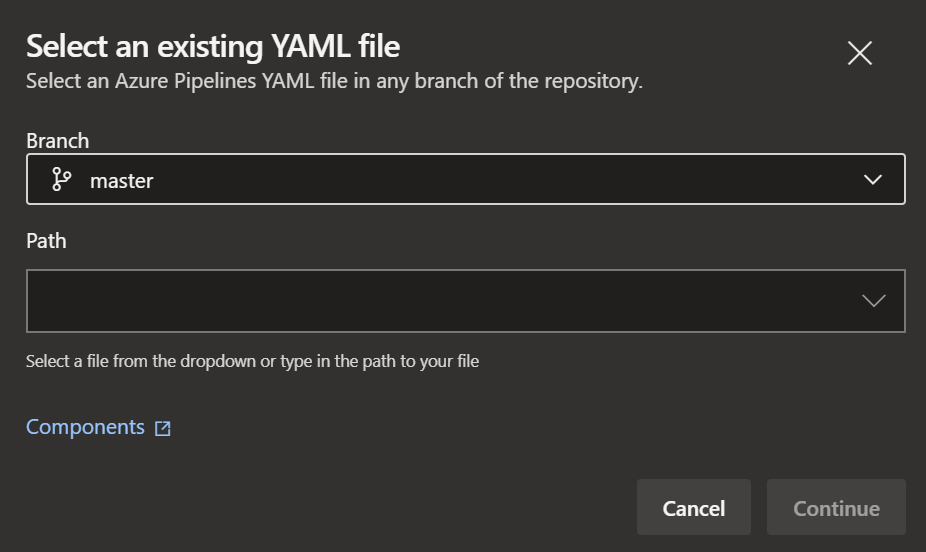
-
Finally, Azure DevOps should show you the pipeline file you created. The last thing you have to do is to either select 'Run' on the top right (which will save & run the pipeline), or click the little arrow next to it and just save the pipeline.
-
Once saved you can also re-name / move the pipeline in the same view. However, this only works once you saved the pipeline at least once.
