-
Notifications
You must be signed in to change notification settings - Fork 36
Active Directory Identity Management
In this article, we will configure Active Directory identity management from OpenIDM. Let's look at a typical scenario where HR hires a new employee, and enters their credentials into an account management system (IDM). From this system, the data must be imported into the main directory. Typically, this is Active Directory.
How to quickly deploy OpenIDM was described in this article. Therefore, we will assume that you already have OpenIDM deployed.
From the samples/provisioners directory of the OpenIDM distribution, copy the provisioner.openicf-adldap.json file into the openidm/conf directory
Change the configuration values to match your environment:
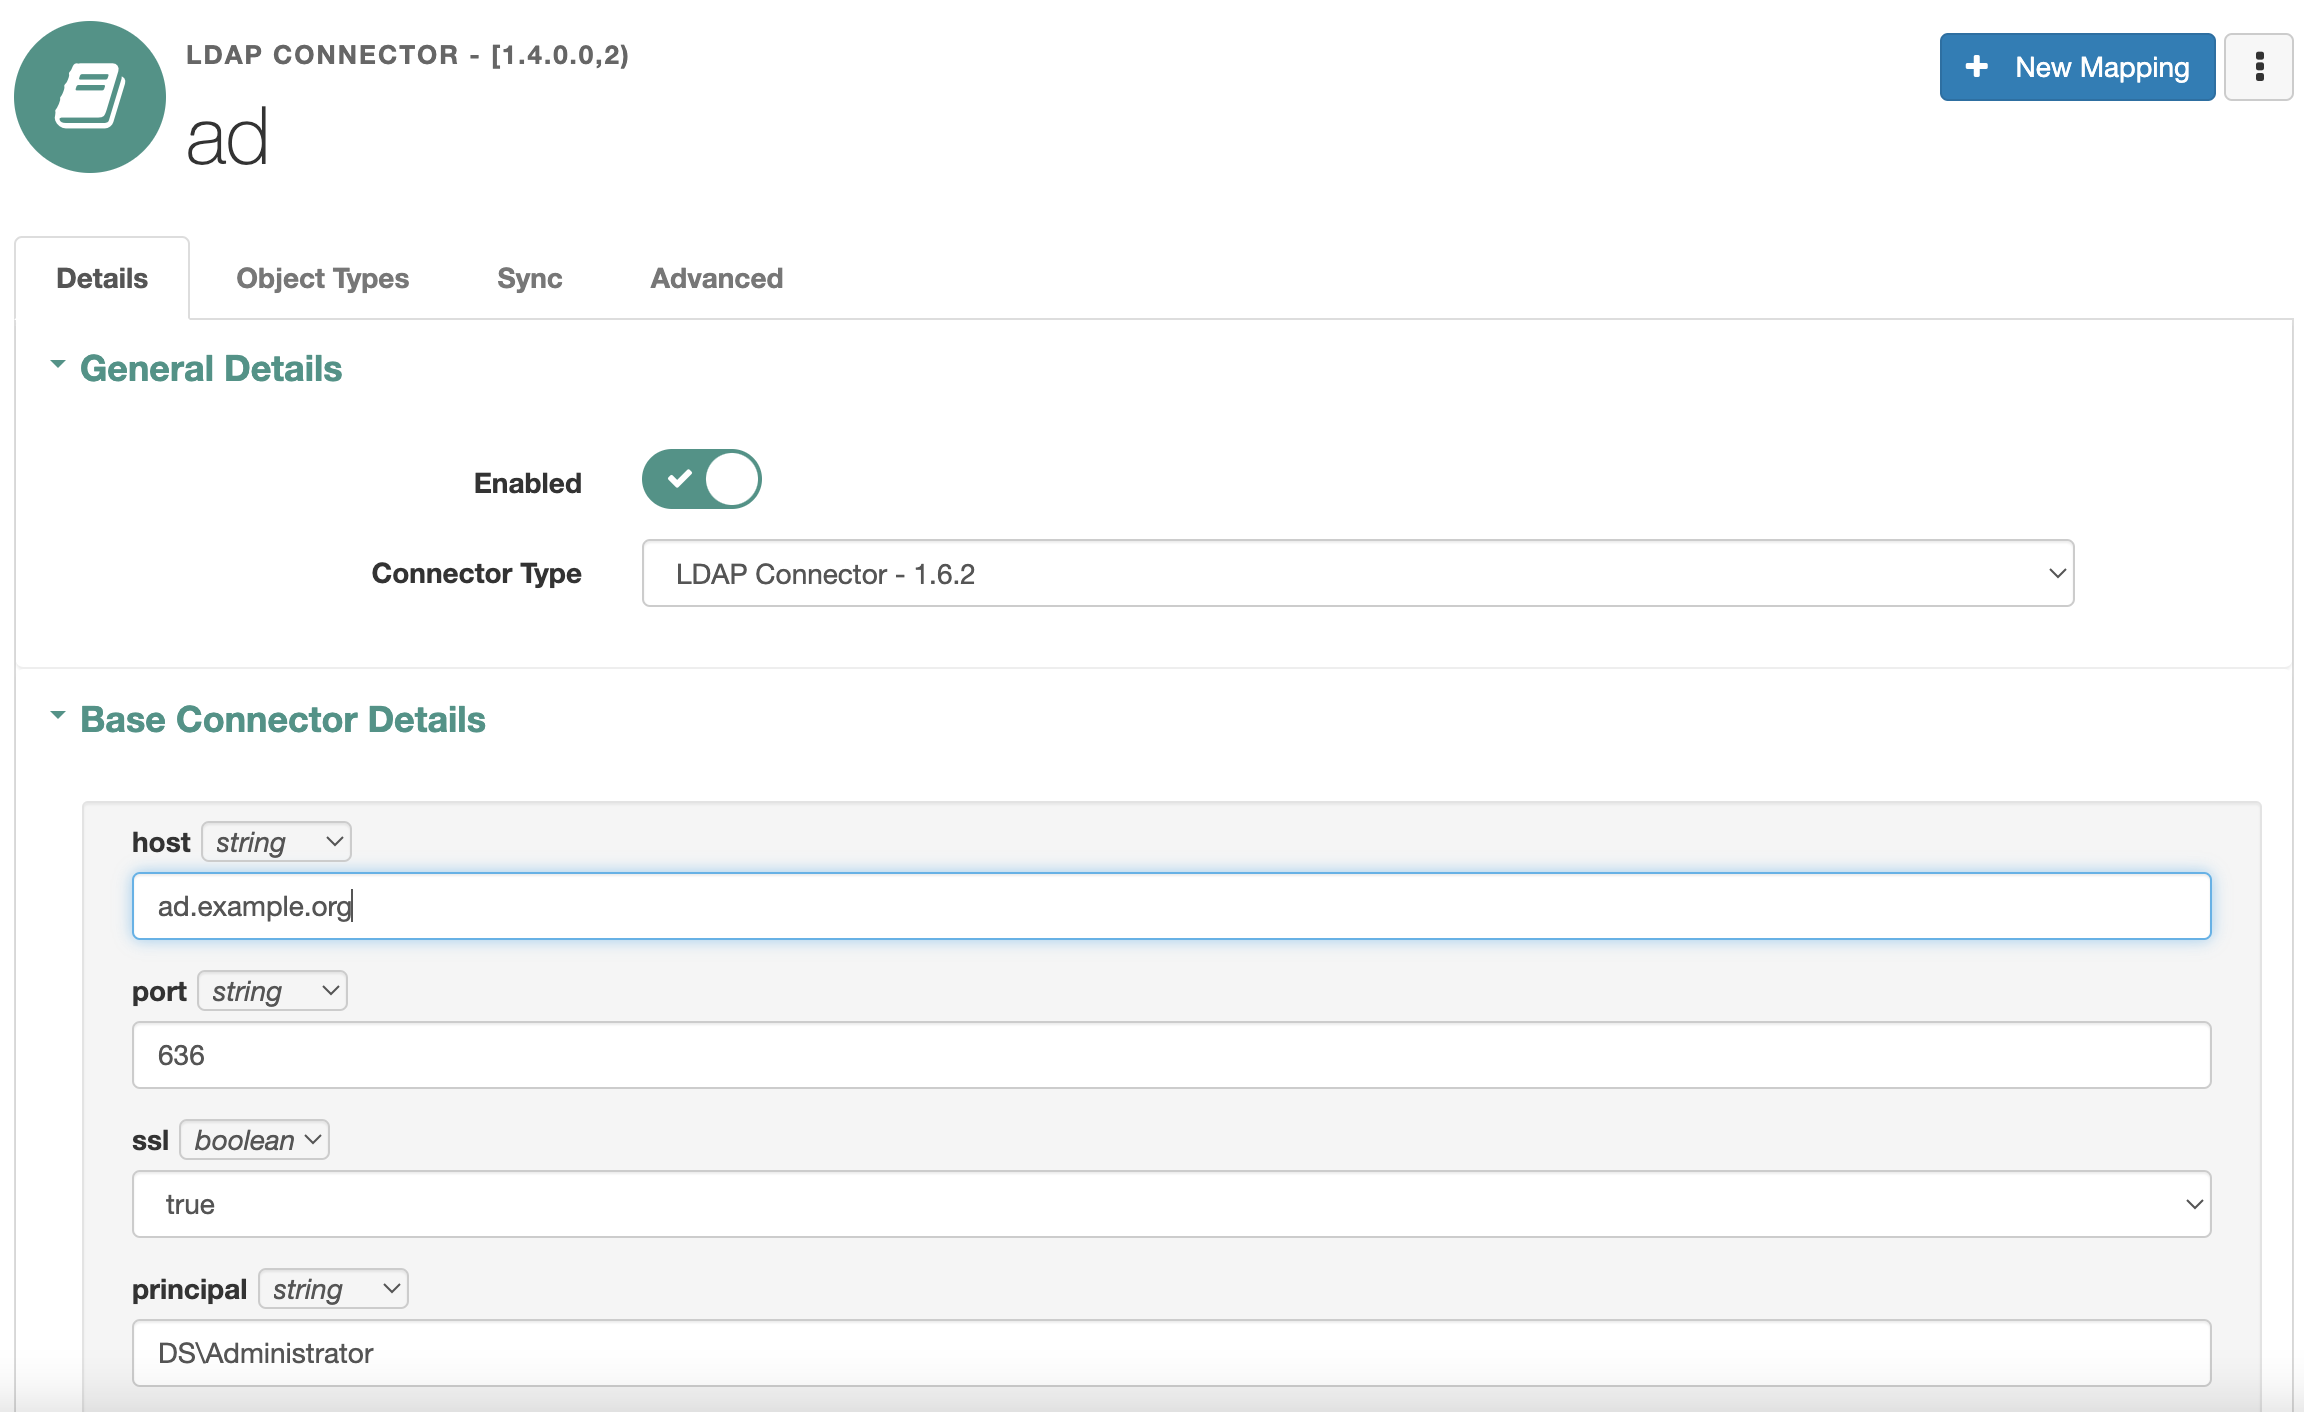
In the administrator console select Configure -> Connectors. In the list select AD LDAP Connector and set the settings according to the following table

| Setting | Description | Example value |
|---|---|---|
| host | Active Directory hostname or IP | ad.example.org |
| port | Active Directory port | 636 |
| ssl | Use SSL connection | true |
| principal | Active Directory account name | DOMAIN/Administrator |
| credentials | Account password (string, after saving, the value will be encrypted) | |
| baseContexts | One or more starting points in the LDAP tree that will be used when searching the tree. | CN=Users,DC=example,DC=org |
| baseContextsToSynchronize | One or more starting points in the LDAP tree that will be used to determine if a change should be synchronized. | CN=Users,DC=example,DC=org |
| accountSearchFilter | LDAP Filter for Retrieving Accounts | (objectClass=user) |
| accountSynchronizationFilter | An optional LDAP filter for the objects to synchronize. | (objectClass=user) |
| groupSearchFilter | LDAP Filter for Retrieving Groups | (objectClass=group) |
| groupSynchronizationFilter | An optional LDAP filter for the objects to synchronize. | (objectClass=group) |
To synchronize passwords from OpenIDM to Active Directory, the connection must be over a secure protocol. To set up a secure connection, save the certificate from the Active Directory with the command:
openssl s_client -showcerts -connect ad.example.org:636 </dev/null 2>/dev/null|openssl x509 -outform PEM > ad_cert.pemUpload the certificate to the OpenIDM trust store with the command:
keytool -import -alias openidm-ad -file ad_cert.pem -storetype JKS -keystore truststoreThe trust store is located in the OpenIDM distribution directory in the openidm/security subdirectory. The default password for the trust store is changeit.
Also, to synchronize passwords from OpenIDM, add the password field after the whenCreated field to the account object in the Active Directory connector configuration file provisioner.openicf-adldap.json
"password" : {
    "type" : "string",
    "nativeName" : "__PASSWORD__",
    "nativeType" : "JAVA_TYPE_GUARDEDSTRING",
    "flags" : [
        "NOT_READABLE",
        "NOT_RETURNED_BY_DEFAULT"
    ]
}In the UI, in the AD Connector settings at the top right, click the three-dot button and select Data (account). A list of Active Directory accounts will appear


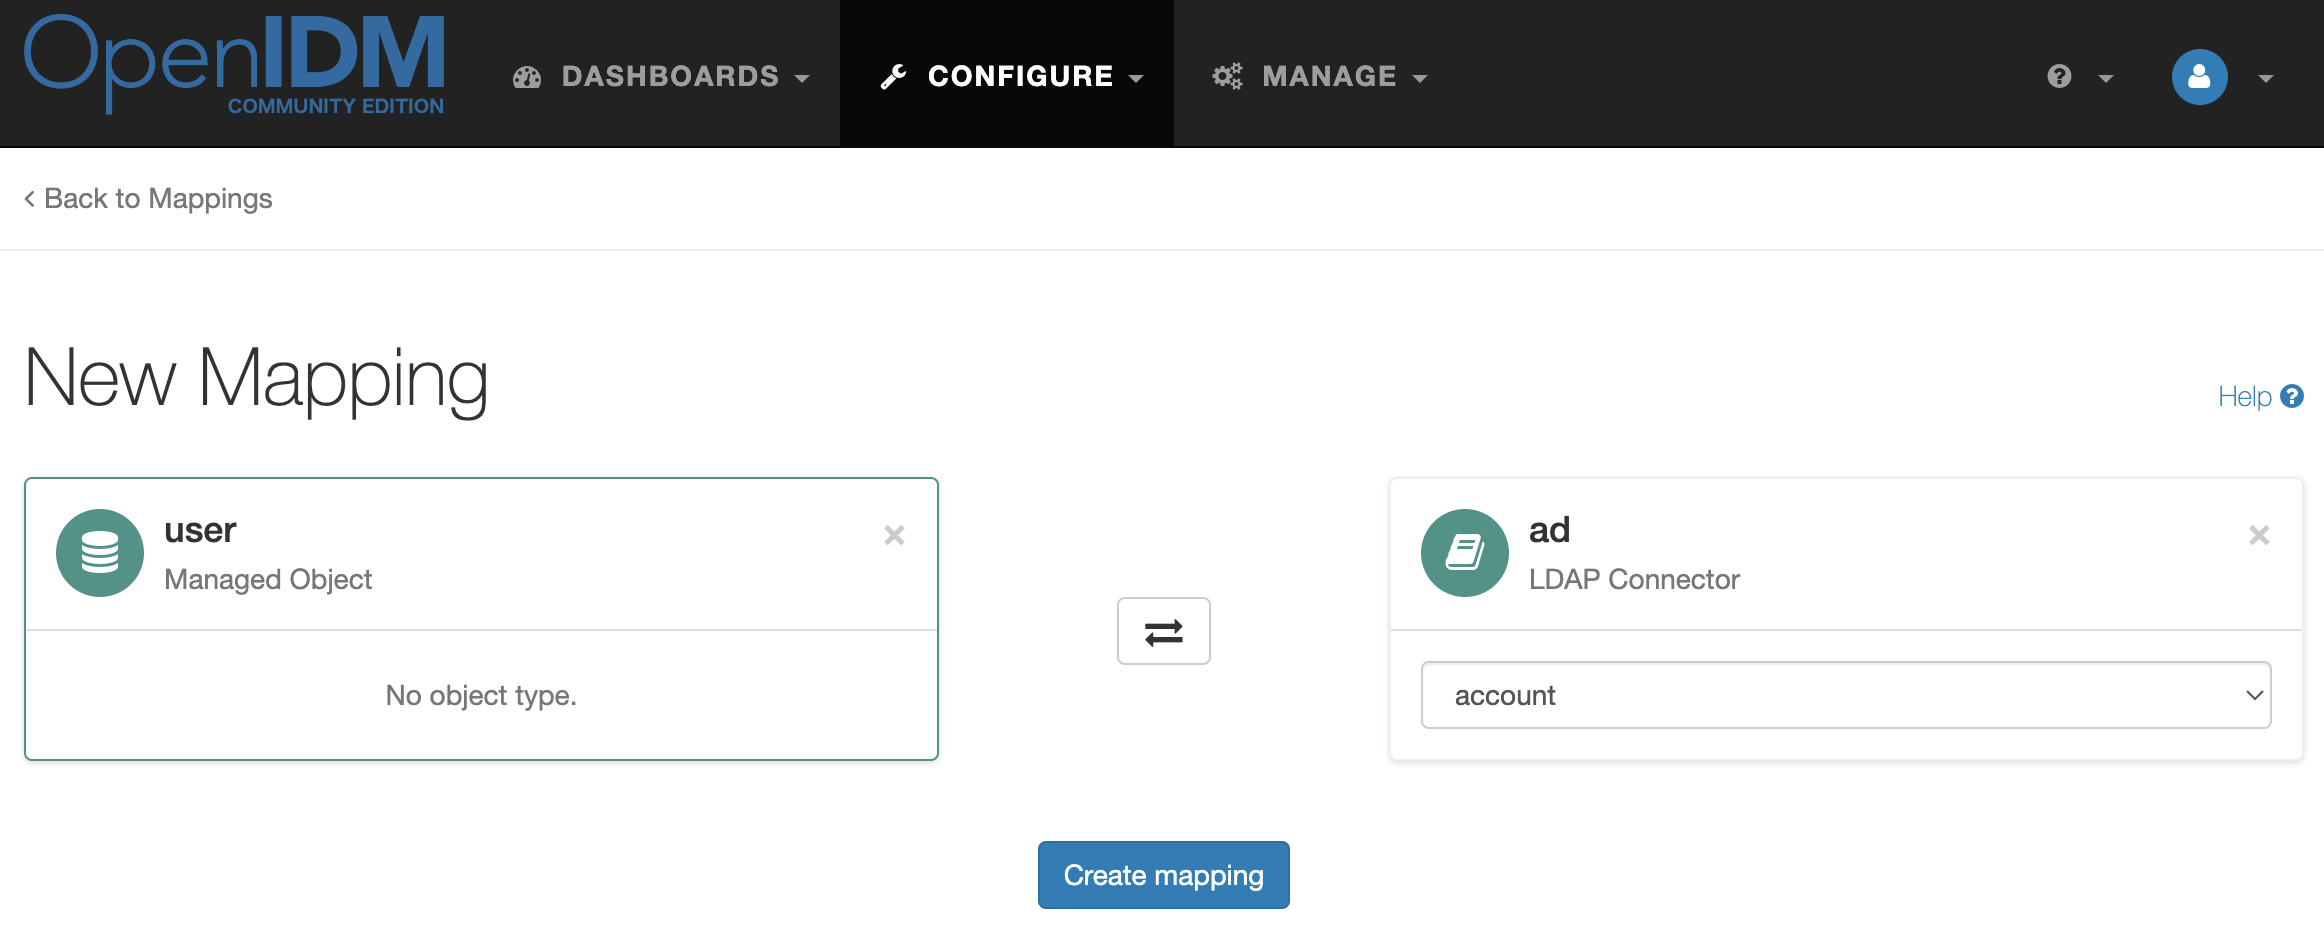
In the administrator console, select Configure → Mappings. Click the New Mapping button.

Into the source resource add Managed Object → user. Into the target resource add Connectors → ad.

And click the Create mapping button
In the administrator console, select Configure → Mappings → managedUser_systemAdAccount
In the Attributes Grid, configure the attribute mapping according to the table:
| Soruce | Destination | Trasnformation script | Conditional updates |
|---|---|---|---|
| userName | dn | 'CN=' + source + ',CN=Users,DC=example,DC=org' |
|
| givenName | givenName | ||
| sn | sn | ||
| cn | source.displayName |
||
| description | description | !!object.description |
|
| telephoneNumber | telephoneNumber | !!object.telephoneNumber |
|
| userName | sAMAccountName | ||
| password | password |
On the Behaviors tab, under Policies, select Default Actions and click the Save button.
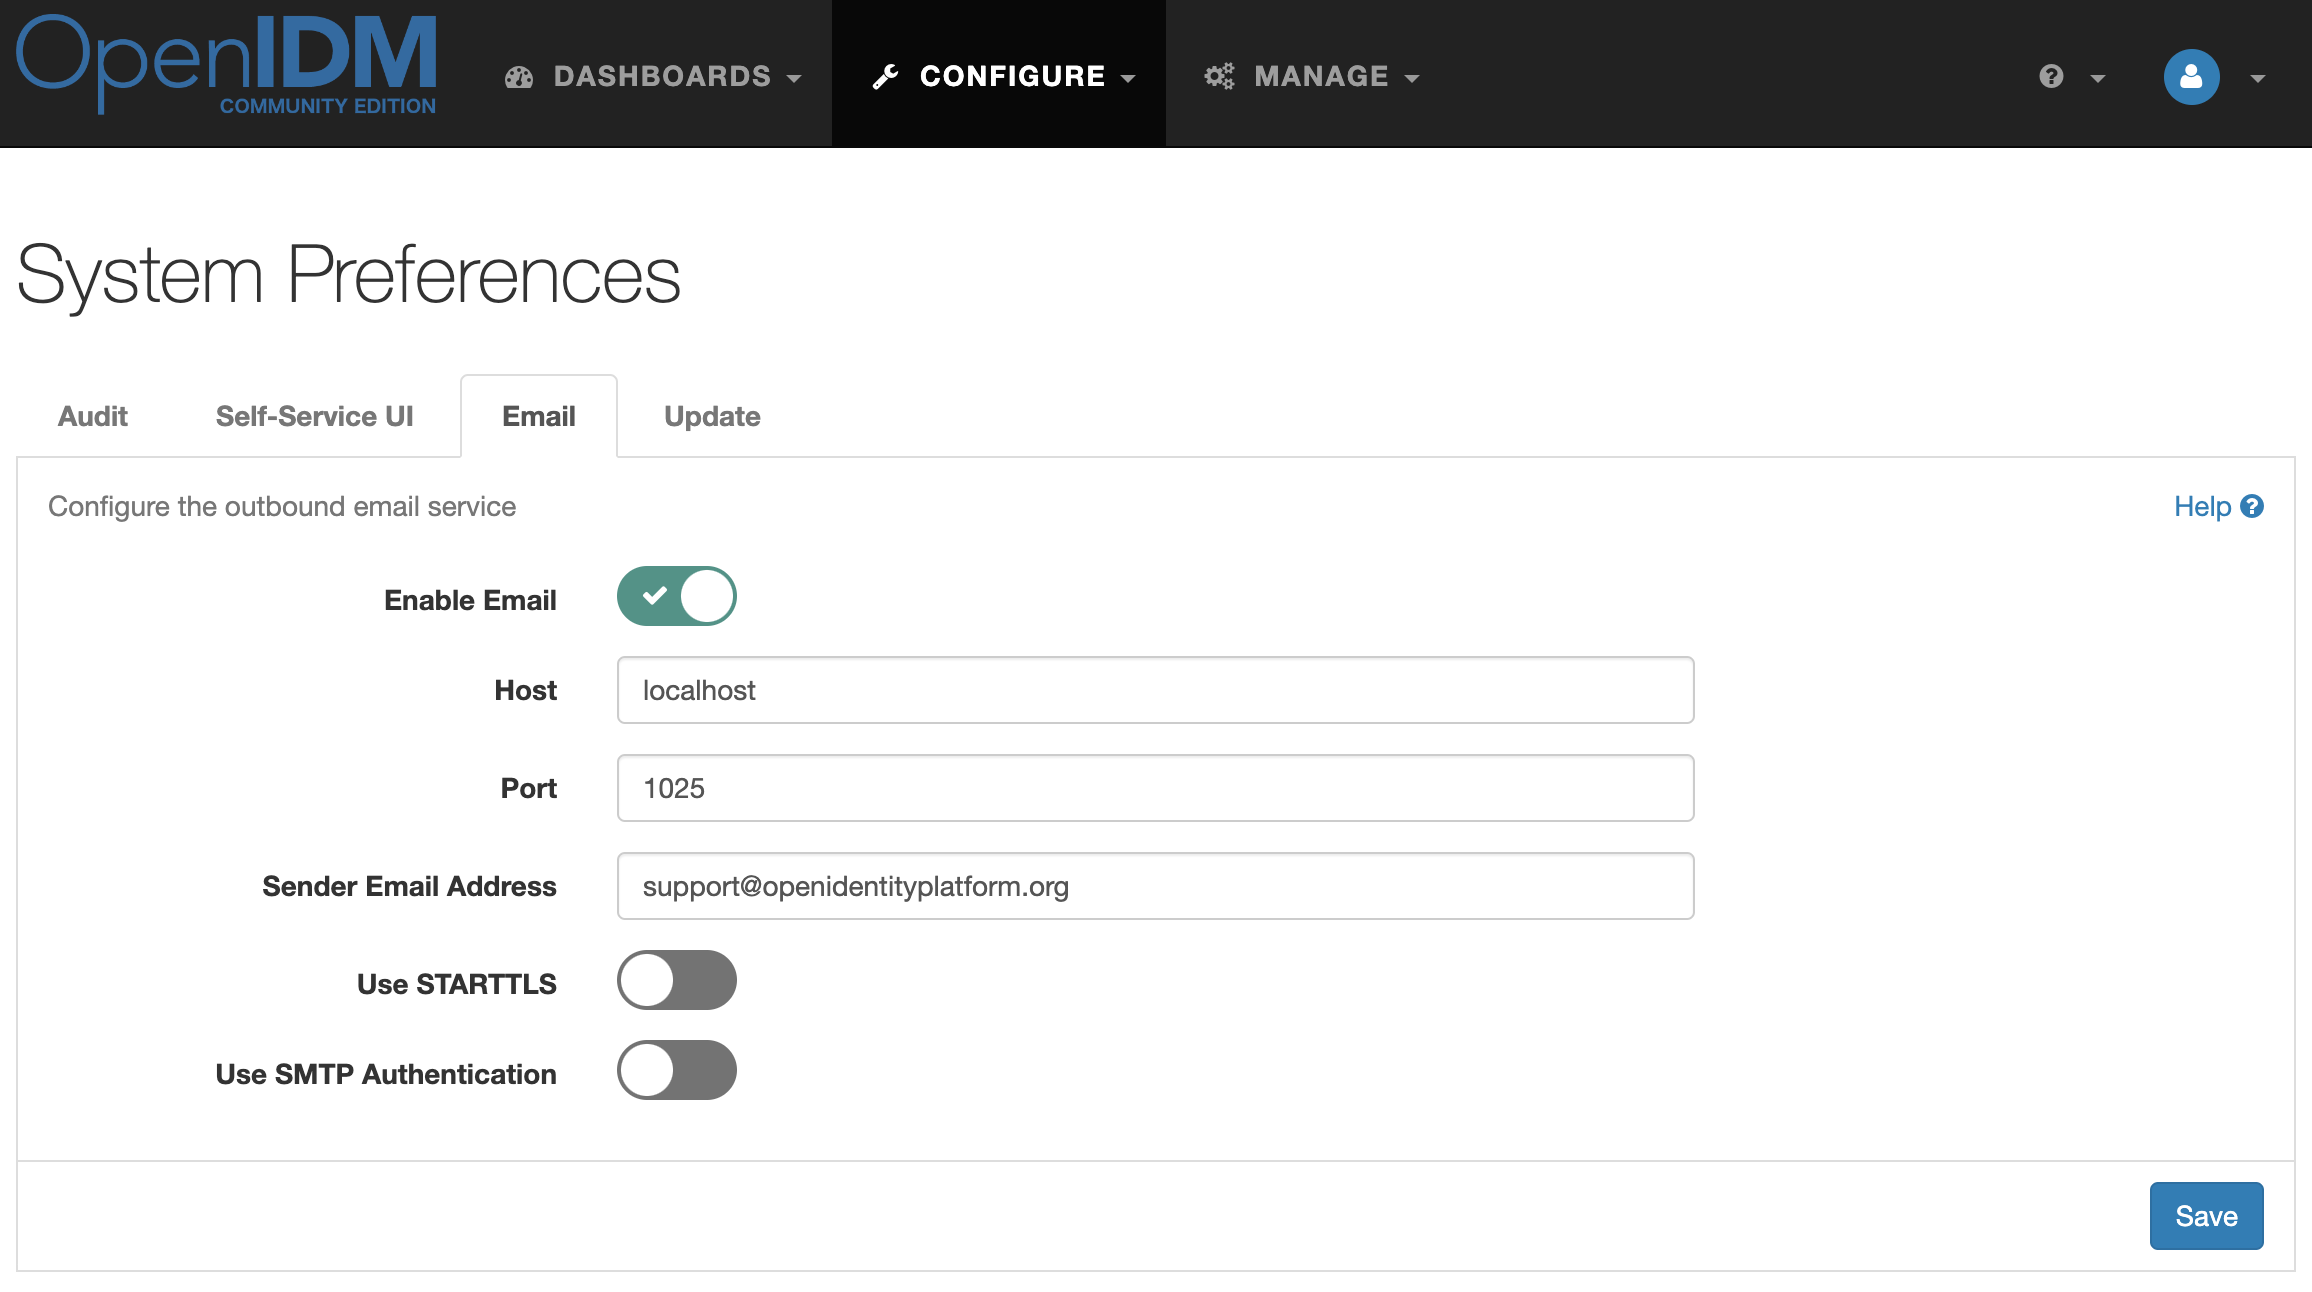
OpenIDM can generate a random password and send it to email. To configure this in the administrator console, go to Configure → System Preferences → Email. Enter the SMTP server settings and click Save

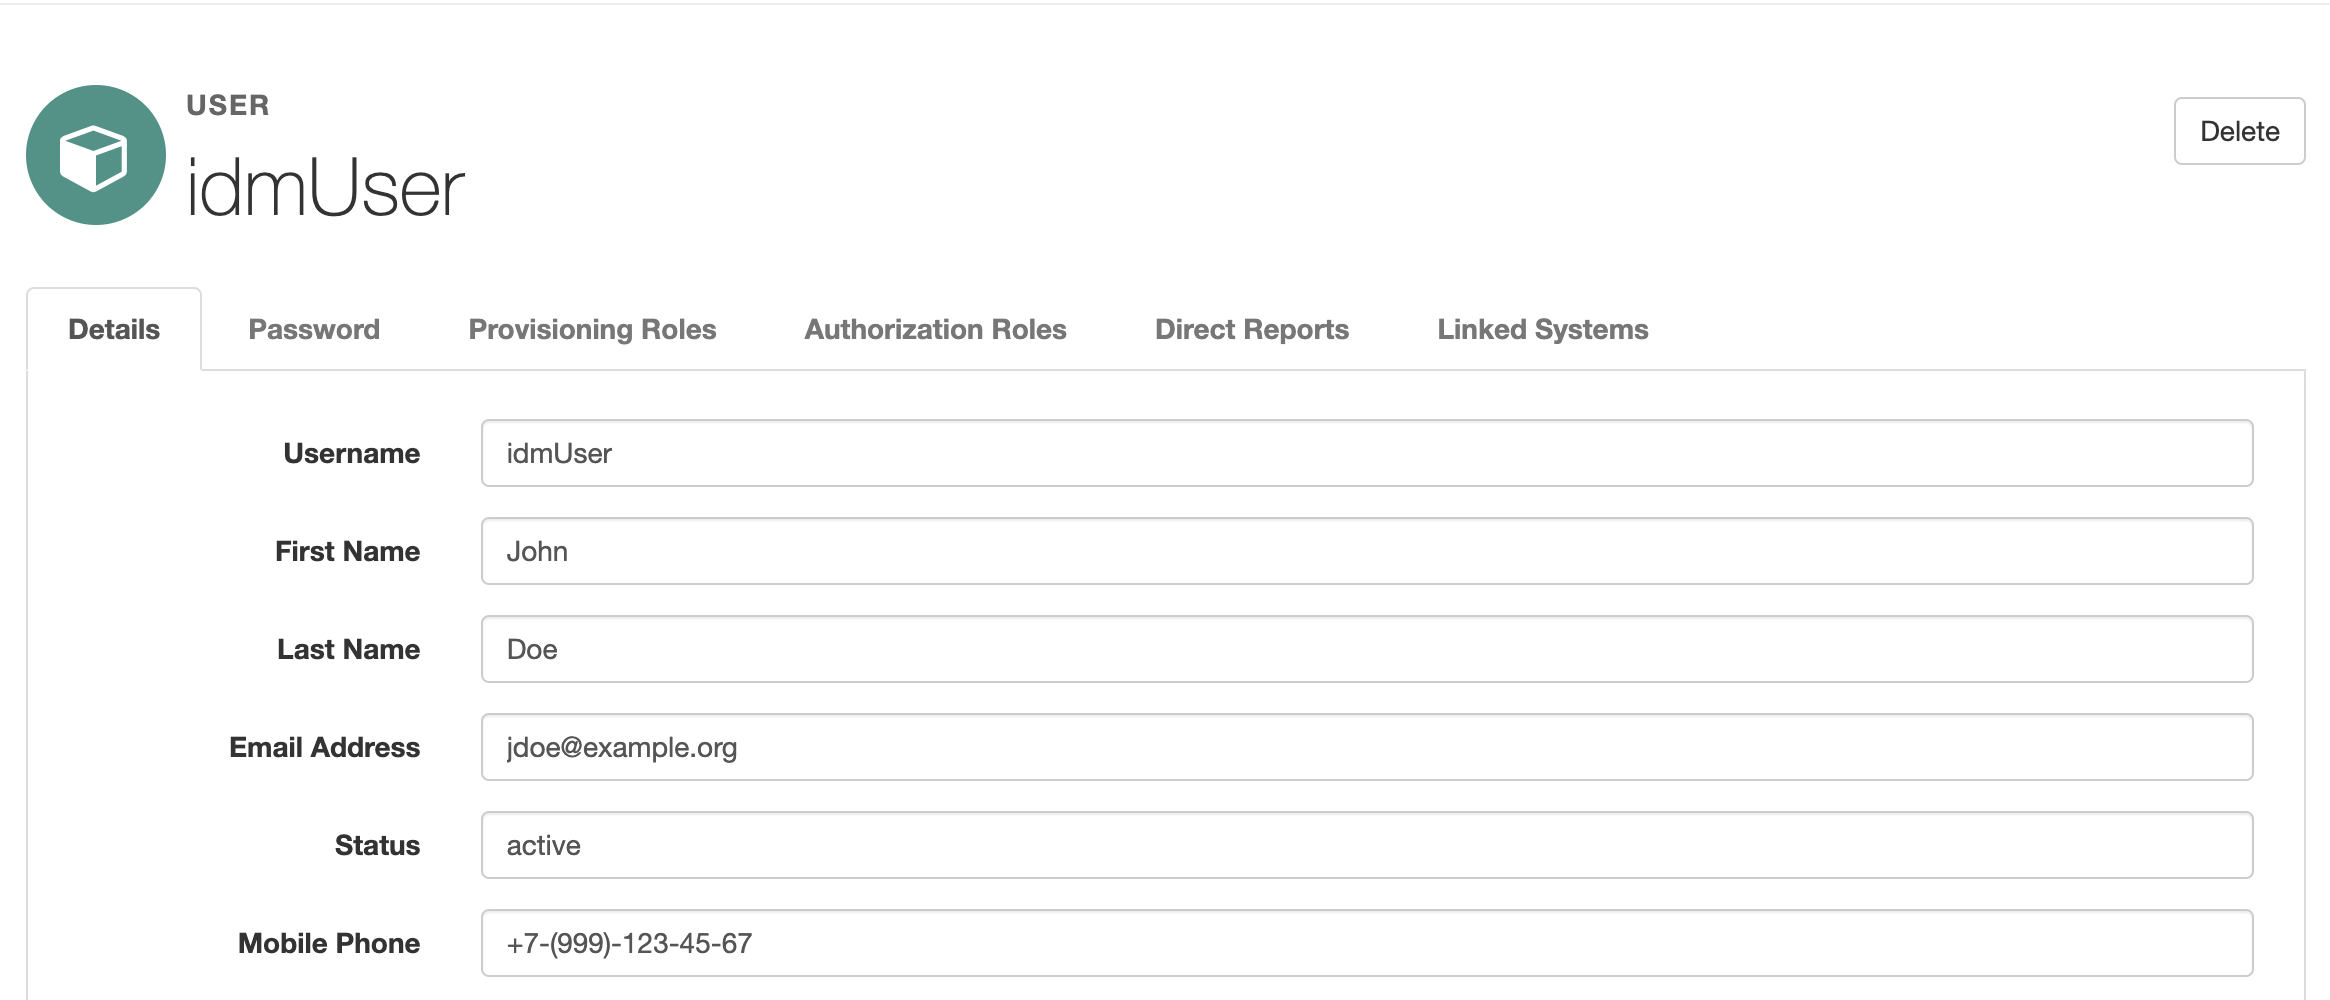
Now that we have configured the connection to the Active Directory and synchronization between OpenIDM and AD accounts, let's test how the solution works. In the administrator console, select Manage → User and create a new account by clicking the New User button. Fill in the attributes of the new user and click Save.

You can also create an account using OpenIDM REST API
curl 'http://localhost:8080/openidm/managed/user?_action=create' \
 -H 'X-OpenIDM-Username: openidm-admin' \
 -H 'X-OpenIDM-Password: openidm-admin' \
 -H 'Content-Type: application/json' \
 --data-raw '{"mail":"[email protected]","sn":"John","givenName":"Doe","telephoneNumber":"+7(999)123-45-67","userName":"idmUser"}' | json_pp

  % Total    % Received % Xferd  Average Speed   Time    Time     Time  Current
                                 Dload  Upload   Total   Spent    Left  Speed
100   357    0   242  100   115   1340    637 --:--:-- --:--:-- --:--:--  2063
{
   "_id" : "a250eb09-28a1-4fab-b338-e729986f38ec",
   "_rev" : "2",
   "accountStatus" : "active",
   "effectiveAssignments" : [],
   "effectiveRoles" : [],
   "givenName" : "Doe",
   "mail" : "[email protected]",
   "sn" : "John",
   "telephoneNumber" : "+7(999)123-45-67",
   "userName" : "idmUser"
}
You can also check if the account has been created using a GET request to the API
curl 'http://localhost:8080/openidm/managed/user?_queryFilter=true' \
 -H 'X-OpenIDM-Username: openidm-admin' \
 -H 'X-OpenIDM-Password: openidm-admin' | json_pp
  % Total    % Received % Xferd  Average Speed   Time    Time     Time  Current
                                 Dload  Upload   Total   Spent    Left  Speed
100   380    0   380    0     0  25112      0 --:--:-- --:--:-- --:--:-- 47500
{
   "pagedResultsCookie" : null,
   "remainingPagedResults" : -1,
   "result" : [
      {
         "_id" : "a250eb09-28a1-4fab-b338-e729986f38ec",
         "_rev" : "2",
         "accountStatus" : "active",
         "effectiveAssignments" : [],
         "effectiveRoles" : [],
         "givenName" : "Doe",
         "mail" : "[email protected]",
         "sn" : "John",
         "telephoneNumber" : "+7(999)123-45-67",
         "userName" : "idmUser"
      }
   ],
   "resultCount" : 1,
   "totalPagedResults" : -1,
   "totalPagedResultsPolicy" : "NONE"
}
The OpenIDM account will be synchronized in the Active Directory automatically
Check its presence in AD with the command
ldapsearch -H ldap://ad.example.org.ru -x -W -D "[email protected]" -b "dc=example,dc=org" "(sAMAccountName=idmUser)" | grep dn
Enter LDAP Password:
dn: CN=idmUser,CN=Users,DC=example,DC=org
If you want to set a random password for Active Directory, go to the Password tab and click the Email Random Password button.

Or with a POST request to the API
curl 'http://localhost:8080/openidm/managed/user/a250eb09-28a1-4fab-b338-e729986f38ec?_action=resetPassword' \
 -X 'POST' \
 -H 'X-OpenIDM-Username: openidm-admin' \
 -H 'X-OpenIDM-Password: openidm-admin' | json_pp
  % Total    % Received % Xferd  Average Speed   Time    Time     Time  Current
                                 Dload  Upload   Total   Spent    Left  Speed
100   242    0   242    0     0    100      0 --:--:--  0:00:02 --:--:--   101
{
   "_id" : "a250eb09-28a1-4fab-b338-e729986f38ec",
   "_rev" : "4",
   "accountStatus" : "active",
   "effectiveAssignments" : [],
   "effectiveRoles" : [],
   "givenName" : "Doe",
   "mail" : "[email protected]",
   "sn" : "John",
   "telephoneNumber" : "+7(999)123-45-67",
   "userName" : "idmUser"
}
A new password will be generated and sent to the user by Email. The same password will be set for the Active Directory login.
In the Administrator Console, go to Manage → User. Select an account and click Delete.

In the pop-up dialog box, click the Ok button.
By using a DELETE request to the OpenIDM API:
curl 'http://localhost:8080/openidm/managed/user/a250eb09-28a1-4fab-b338-e729986f38ec' \
 -X 'DELETE' \
 -H 'X-OpenIDM-Username: openidm-admin' \
 -H 'X-OpenIDM-Password: openidm-admin' | json_pp
  % Total    % Received % Xferd  Average Speed   Time    Time     Time  Current
                                 Dload  Upload   Total   Spent    Left  Speed
100   242    0   242    0     0    756      0 --:--:-- --:--:-- --:--:--   773
{
   "_id" : "a250eb09-28a1-4fab-b338-e729986f38ec",
   "_rev" : "4",
   "accountStatus" : "active",
   "effectiveAssignments" : [],
   "effectiveRoles" : [],
   "givenName" : "Doe",
   "mail" : "[email protected]",
   "sn" : "John",
   "telephoneNumber" : "+7(999)123-45-67",
   "userName" : "idmUser"
}
Let's check OpenIDM account deletion via REST API
curl 'http://localhost:8080/openidm/managed/user?_queryFilter=true' \
 -H 'X-OpenIDM-Username: openidm-admin' \
 -H 'X-OpenIDM-Password: openidm-admin' | json_pp
  % Total    % Received % Xferd  Average Speed   Time    Time     Time  Current
                                 Dload  Upload   Total   Spent    Left  Speed
100   138    0   138    0     0   7306      0 --:--:-- --:--:-- --:--:-- 11500
{
   "pagedResultsCookie" : null,
   "remainingPagedResults" : -1,
   "result" : [],
   "resultCount" : 0,
   "totalPagedResults" : -1,
   "totalPagedResultsPolicy" : "NONE"
}
Check if the account exists in Active Directory with the command:
ldapsearch -H ldap://ad.example.org.ru -x -W -D "[email protected]" -b "dc=example,dc=org" "(sAMAccountName=idmUser)" | grep dn | wc -l
Enter LDAP Password:
0
As you can see from the output of the command, the account has been removed from the AD.
OpenIDM enables you to consolidate multiple identity sources for policy and workflow-based management. OpenIDM can consume, transform and feed data to external sources so that you maintain control over the identities of users, devices and other objects.
OpenIDM provides a modern UI experience that allows you to manage your data without writing a single line of code. The standard RESTful interfaces also offer ultimate flexibility so that you can customize and develop the product to fit the requirements of your deployment.


