-
Notifications
You must be signed in to change notification settings - Fork 579
[Examples] Create and Assign Custom RBAC Roles
This page describes how to use the module to create your own custom RBAC roles and assign them at the appropriate scopes within your Azure landing zone deployment.
In this example, we will create a custom RBAC role with the name "Reader Support Tickets" which will allow members to read everything in a subscription and to also open support tickets.
We will then assign the new RBAC Role at the es_landing_zones scope.
We will update the built-in configuration with the new custom RBAC role by following these steps:
-
Create the role definition file
-
Save the new role at the
es_rootscope -
Assign the role at the
es_landing_zonesscope
The files we will use are:
- lib/role_definitions/role_definition_es_reader_support_tickets.tmpl.json
- lib/archetype_extension_es_root.tmpl.json
- lib/archetype_extension_es_landing_zones.tmpl.json
IMPORTANT: To allow the declaration of custom or expanded templates, you must create a custom library folder within the root module and include the path to this folder using the
library_pathvariable within the module configuration. In our example, the directory islib.
In your lib directory create a role_definitions subdirectory if you don't already have one. You can learn more about archetypes and custom libraries in this article.
NOTE: Creating a
role_definitionssubdirectory is a recommendation only. If you prefer not to create one or to call it something else, the custom roles will still work.
In the role_definitions subdirectory, create a role_definition_es_reader_support_tickets.tmpl.json file. This file will contain the role definition for our Reader Support Tickets role.
We need to ensure that every custom role we create has a unique value for "name". To do that, there are a number of tooling options we can use, including:
- The
New-GuidPowerShell cmdlet - The *nix tool
uuidgen - The
uuidv5function that is built-in to Terraform.
NOTE: This isn't an exhaustive list. As long as the generated value is unique, the tool used isn't important.
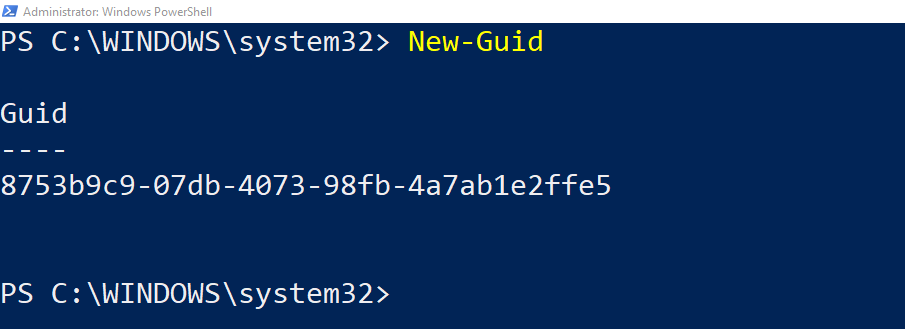
In this example, we will use New-Guid to generate the name value for our Reader-Support-Tickets role definition. Using New-Guid is as simple as opening a PowerShell window and running the New-Guid cmdlet. It will then generate a unique value for you to use.

Now that we have a unique "name" for our new role definition, copy the below code in to the role_definition_es_reader_support_tickets.tmpl.json file and save it, making sure to update the value of "name" with your result from running New-Guid.
{
    "name": "8753b9c9-07db-4073-98fb-4a7ab1e2ffe5",
    "type": "Microsoft.Authorization/roleDefinitions",
    "apiVersion": "2018-01-01-preview",
    "properties": {
        "roleName": "Reader-Support-Tickets",
        "description": "View everything in the subscription and also open support tickets.",
        "type": "customRole",
        "permissions": [
            {
                "actions": [
                    "*/read",
                    "Microsoft.Support/*"
                ],
                "notActions": [],
                "dataActions": [],
                "notDataActions": []
            }
        ],
        "assignableScopes": [
            "${current_scope_resource_id}"
        ]
    }
}To assign a custom role, we need to expand upon the built-in configuration by using archetype extensions.
You can learn more about archetype extensions in this article.
If you don't already have an archetype_extension_es_root.tmpl.json file within your custom lib directory, create one and copy the below code in to the file.
This code will save your new Reader-Support-Tickets role at this scope and allow it to be used either at the es_root scope or below.
{
  "extend_es_root": {
    "policy_assignments": [],
    "policy_definitions": [],
    "policy_set_definitions": [],
    "role_definitions": ["Reader-Support-Tickets"],
    "archetype_config": {
      "parameters": {},
      "access_control": {}
    }
  }
}
If you don't already have an archetype_extension_es_landing_zones.tmpl.json file within your custom lib directory, create one and copy the below code in to the file.
This code will assign your new Reader-Support-Tickets role to a group named Contoso Reader and Support Tickets.
In order to assign the Reader-Support-Tickets role to the group, you need to use the groups objectID which can be located in Microsoft Entra ID.
Instead of group, if you would like to assign the role to a SPN in the form of application registered in Microsoft Entra ID then make sure to use the Object ID of the Service Principal related to that application which you can find from the "Enterprise applications" blade of Microsoft Entra ID Portal. For more details on the relation between application and service principal objects please see this article.
IMPORTANT: Due to how the module works, you must prefix your role name with the location at which it has been saved. In our example this would be
"[CONTOSO]". If we had saved our role at thees_landing_zonesscope then we would use a prefix of"[CONTOSO-LANDING-ZONES]"
{
  "extend_es_landing_zones": {
    "policy_assignments": [],
    "policy_definitions": [],
    "policy_set_definitions": [],
    "role_definitions": [],
    "archetype_config": {
      "parameters": {},
      "access_control": {
        "[CONTOSO] Reader-Support-Tickets": ["2f449a58-06b8-48a2-b60c-9107be0ca878"]
      }
    }
  }
}IMPORTANT: Remember to replace the GUID in the code above with the objectID of the group you're assigning the role to in your own tenant.
You should now kick-off your Terraform workflow (init, plan, apply) again to apply the updated configuration. This can be done either locally or through a pipeline.
When your workflow has finished, the Reader-Support-Tickets role will be assigned to the Contoso Reader and Support Tickets group at the Landing Zones Management Group.
This wiki is being actively developed
If you discover any documentation bugs or would like to request new content, please raise them as an issue or feel free to contribute to the wiki via a pull request. The wiki docs are located in the repository in the docs/wiki/ folder.
- Home
- User guide
- Video guides
-
Examples
- Level 100
- Level 200
-
Level 300
- Deploy multi region networking with custom settings (Hub and Spoke)
- Deploy multi region networking with custom settings (Virtual WAN)
- Deploy with Zero Trust network principles (Hub and Spoke)
- Deploy identity resources with custom settings
- Deploy management resources with custom settings
- Expand built-in archetype definitions
- Create custom policies, initiatives and assignments
- Override module role assignments
- Control policy enforcement mode
- Policy assignments with user assigned managed identities
- Level 400
- Frequently Asked Questions
- Troubleshooting
- Contributing