-
Notifications
You must be signed in to change notification settings - Fork 7
Getting Started
These instructions assume basic technical skills. If you can use a screw driver, then you can probably build ExoMy if you follow the instructions carefully. Children should be supervised during the building process.
It is normal for things to fail. 3D printing can still contain a lot of uncertainties and variance and humans make mistakes from which we learn.
Throughout the wiki instructions you will find multiple parts list for procurements, assemblies and 3D-printed parts. These lists provide as general reference but it can not be guaranteed, that they match your release. It is strongly recommended to use the lists provided and drawings provided in the release, as only those are guaranteed to match your build!
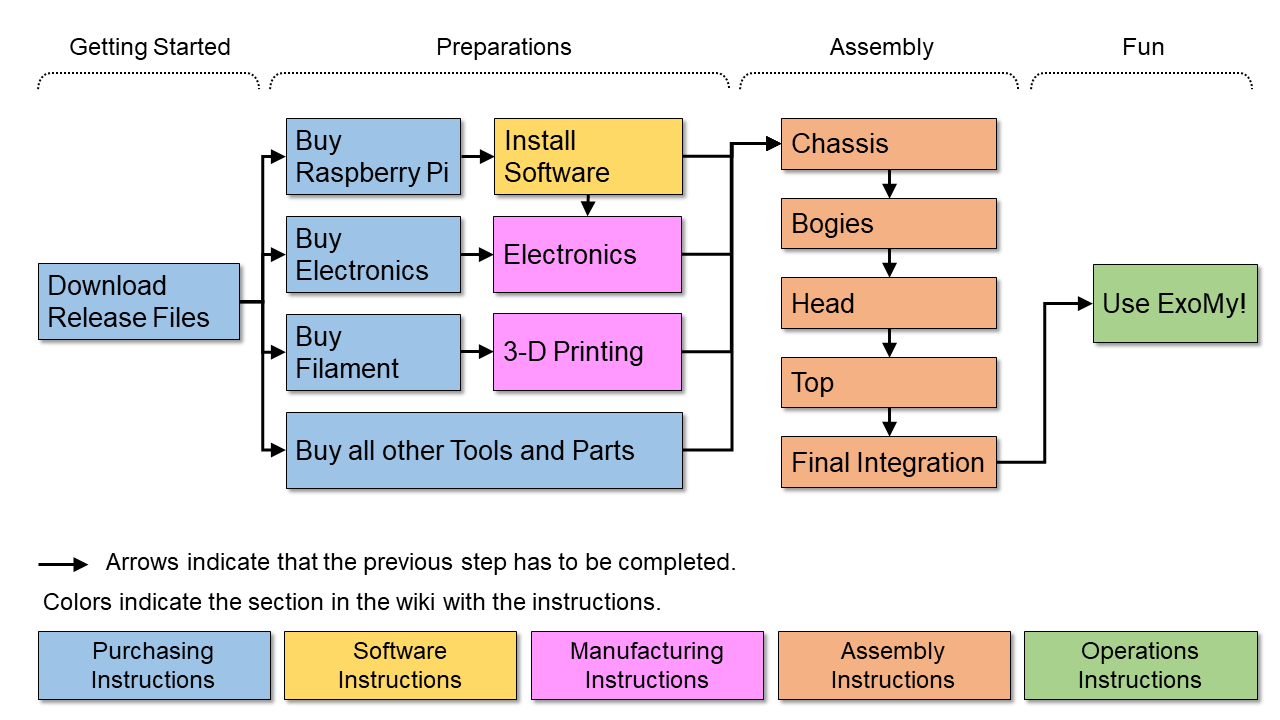
The build of ExoMy consists of four main phases:
- Purchasing and sourcing of parts, materials and tools.
- Software installation and testing.
- Manufacturing of 3D printed parts and electronics.
- Assembly, integration and testing of ExoMy.

From start to finish, the build process is expected to take about two to three weeks. The printing take around 2 weeks on a single printer, the electronics manufacturing around half a day and the main assembly is expected to take one to two days.
Keep in mind that these estimates depend heavily on your experience with 3D-printing, soldering and tinkering in general!
This release contains all files needed to build ExoMy.
Help you order the requried parts, material and tools.
Show how to install the software.
Explain how to solder and test the electronics and how to 3D print the parts.
Describe how to assemble and test ExoMy.
Tell you how to operate and use ExoMy.
Additional components which can change the apperance and functionality of ExoMy.
Build
- Getting Started
- Purchasing Instructions
- Software Instructions
- Manufacturing Instructions
- Assembly Instructions
- Optional Parts
Use
Contribute
Help